This said, I've been working on a new Atlantic Branch, hereby dubbed V2. I hope to maintain regular posts as this project develops. Thanks for sticking with me, and enjoy.
Saturday, August 10, 2019
End of the Crickets
It's been long time since I posted here, over a whole year in fact. In that time a lot has happened. Between high workload at work and troubles at home, not much time for the layout was available. Also, in December, I moved to a new place. Therefore, the layout had to come down.
Sunday, August 19, 2018
Tunneling Under the Mountain... Part 2
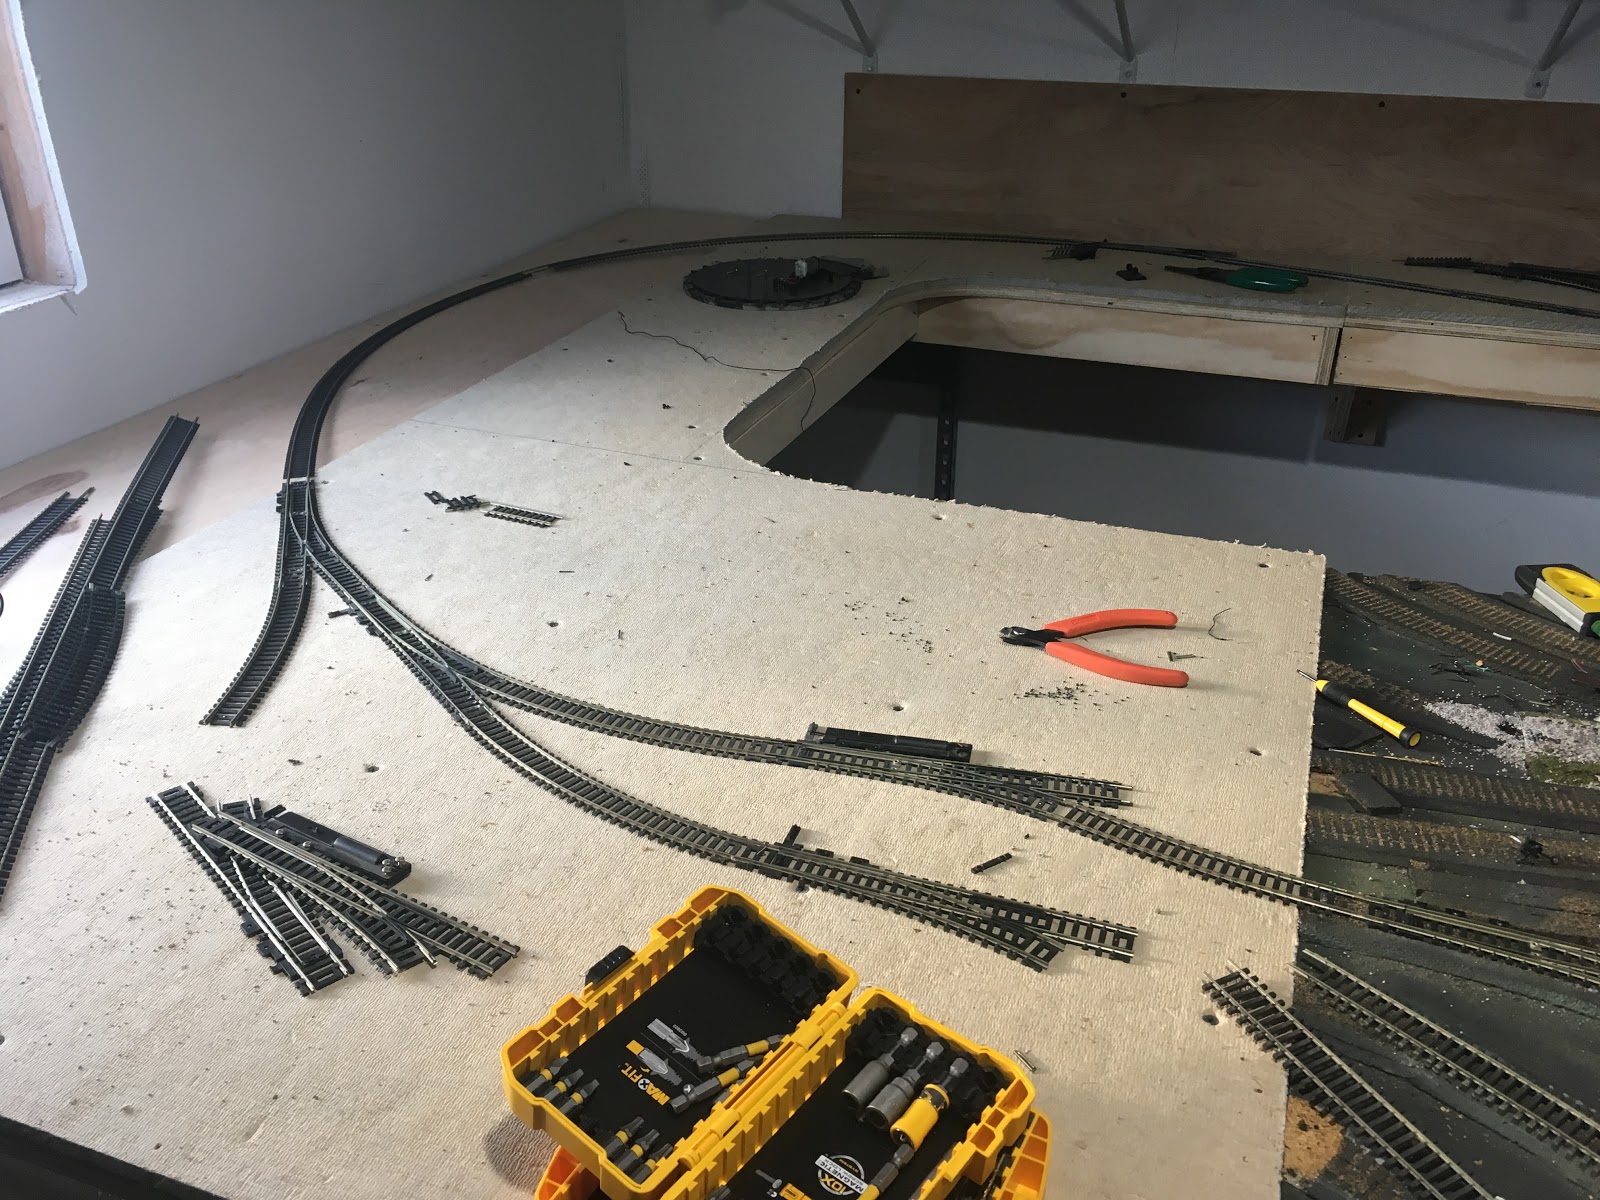
The last step before attaching the spline to the benchwork was to lay the new cork roadbed down. It was much easier to do so with the spline sitting on the floor next to the layout. Once the glue dry, the spline was attached to the benchwork and the track was laid. Fortunately, two pieces of flextrack was sufficient to cover the distance required. To reduce work over the long reach back to the track, I soldered a set of feewders prior to installation. I attached the feeders directly to the junction point between the two sections of track, thereby effectively soldering the rails together and ensuring 100% electrical relability for both sections.


Here is the view under the mountain with the track installed. The box structure supporting the track in the foreground is part of the assembly for the staging connection. The staging yard will be discussed further soon.
Monday, August 13, 2018
Tunneling Under the Mountain... Part 1
So with the yard laid, the peninsula connected, and wiring upgraded, I next turned my attention to the far end of the layout. The photo below shows what was there prior to moving.

Running up the back of the layout, it appears to be a double mainline, however, once exiting from the mountain, it actually ended in an industry siding for the inner track while the outer track continued to the other side of the layout. The idea of having a switching lead through the tunnel seemed very silly to me. Also, with 18" and 22" radius respectively, there was concern with operation. Finally, since I wanted this end of the layout to be the traffic source for the whole layout, I needed a way to incorporate some form of staging.

So, as a common trend with this layout, out came the track.

Removing the track from under the mountain was a challenge. The mainline had been built on Woodland Scenics risers, so those needed to be removed as well. A large access hole was cut on the side which gained the necessary access. While removing the track, I found an old Bachmann gandy dancer hidden away behind the roadbed. Somehow it had been lost, and survived the move within the mountain. A neat find.

To build the new line through the mountain, I utilized a spline roadbed section salvaged from an old layout.

To set the hight of the spline to match the rest of the layout, I built a handful of risers. I used a "L" shape riser to ensure stability and to give me a bit more material to bite into when attaching the risers to the layout.

And finally, the road bed in place. A little clean up and and I'll be ready to lay roadbed and track, but that will be for another post.
Tuesday, August 7, 2018

Monday, August 6, 2018
Juicing the Layout
One of the first things I noticed with this layout when I got it, was the generally poor condition of the layout wiring. Substandard wiring, reliance on rail joiner feeders in totally inadequate quanities, and haphazard design, all led to the quick decision, it would be best to start again from scratch.
So I tapped into the wire supply I had on hand for my Somerset project. 12 gage buss wire and 20 gage feeders would once again be standard. One very important factor to keep in mind is correctly color coding the buss and feeders. I had white and black wire on hand. White was designated for the rail closest to the edge of the benchwork, black closer to the back.


So I tapped into the wire supply I had on hand for my Somerset project. 12 gage buss wire and 20 gage feeders would once again be standard. One very important factor to keep in mind is correctly color coding the buss and feeders. I had white and black wire on hand. White was designated for the rail closest to the edge of the benchwork, black closer to the back.

Installing a feeder in the yard.

Typical feeder bundle connected to the buss.

Another view.

The secondhand layout came with a few Miniatronics boards shown above. Typically I prefer soldered connections over mechanical connections, but since these were on hand, I decided to give them a try. My opinion is that they worked out well, but I'd have a hard time justifying the expense in the future, over the essentially free option of soldering the connections.
Sunday, July 29, 2018
Connecting the Peninsula
One of the first tasks after installing the new corner section was to lay the track connecting the peninsula to what will be the yard. I actually laid the connecting track first, before laying the yard, so the last post was jumping the gun a little bit.


 A view from the end of the peninsula. I've tossed a few buildings around on the layout, but nothing is for sure yet.
This was the initial attempt. Notice the lack of homasote at the back. This would be filled in later. One great advantage to homasote is that you can easily make changes to the design. I was not happy with this attempt, I wanted to maximize the length of the run around track, and I did not like the flow into the industry sidings.

Take two. By relaying the switches I was able to gain another car length in the siding. Also the flow is much better. The missing piece of homasote is now installed. The siding to the left will be used for a small industry, and is positioned to allow for future expansion down that wall as well.

A view from the other side of the peninsula. The switch to nothing is intended to access the ramp to the coal dump. I have not decided if I like this industry or not.

Friday, July 27, 2018

Subscribe to:
Posts (Atom)